Steps:
#1 mask off the area of your piece (I use tape)
#2 sketch out the composition in a colored pencil (include shading)
#3 Color the image using PrismaColor Pencils
#4 Water color
#5 Spray a layer of Krylon Crystal Clear
#6 Apply Liquitex Clear Acrylic Gesso and LiquitexMatte Medium Medium Mat
#7 When the gesso and mat medium are dry, apply an oil glaze over everything
#8 Lift off any extra glaze with turpentine, or a dry kneaded eraser
#9 Go over the texture with a colored pencil (optional step)
#10 Lift off the tape
Explanation of Steps:
#1
Masking off the area you are going to work in makes the finished piece look really nice. Also, it is easier to frame if there is a straight edge without anything on it.
#2
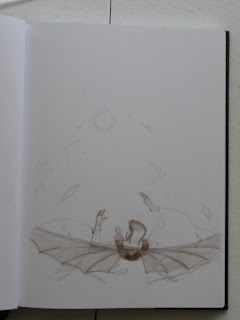
I use a brown colored pencil because it doesn't smear. I use brown because it is a warmer dark color and is good for shading.
*This image is from my sketchbook which I transferred directly onto the prepped illustration board.
#3
Prisma Color Pencils are amazing. I love using them because they blend beautifully. They have a great color selection and are rich in their colors. I haven't found anything better.
#4
Water colors are nice because they blend and unite the colors. They fill in minute areas that your pencil might have missed and start making the piece look together and complete.
*This image is after I used +Prisma Color Pencils and then a layer of watercolor.
#5
Just spray a thin coat of this acrylic fixative, you don't want the pencil to bleed or the watercolor to run when you apply the mat medium and gesso.
#6
I apply Liquitex Clear Acrylic Gesso and Liquitex Matte Medium Medium Mat in an even ratio, with a little bit of water. This gives the piece the textured look. You can make the texture to your liking. You can apply it smoothly, with the brush strokes making a canvas look, or you can go swirly.
Make sure the entire piece is covered with whatever texture style you choose but, if you miss any little spot the next step might ruin your piece.
#7
Make an oil wash of the color you choose, this will unite your piece and make it look finished. Remember your warm colors and cool colors because this will affect the mood of you piece.
*I wanted this piece to look warm so I used a thin layer of "raw sienna" over the entire piece.
#8
If you put too much oil down, you can lift it off using a brush dipped in turpentine or a kneaded eraser. The texture you did in step 6 is now going to show, and that is a good thing.
#9
The "raw sienna" was good, but a little too brown. I wanted more yellow, so I used a Prisma Color Pencil, "Canary Yellow" over the sky area. I was also added some additional highlights and shadows, adding more depth to the piece.
#10
When you are satisfied with your work, you can peal off the taped edges. It's fun to do and it looks amazing!
*Sometimes I switch up steps 3 and 4 drawing and watercolor, it depends on the piece. I really have noticed a difference though when I leave either step out. Both are vital in making the piece have depth. The colored pencil gives texture and detail, and the watercolor brings the colors together.
*If you like how your piece turned out you can stop after the watercolor. However I noticed that the illustration looks more complete when you can bring it together with an oil wash. If you are going to do an oil wash, you have to put a protective layer over your piece.


No comments:
Post a Comment